
WooCommerce Checkout Custom Fields
Add custom fields to your WooCommerce checkout page
Description
When enabled, WooCommerce Checkout Custom Fields module lets you add custom fields to WooCommerce checkout page. This neat feature allows you to add more fields to your checkout page. Choose which section to add the custom field to (Billing / Shipping / Order notes / Account), and choose which type of information field you want to add – add a text field, text area, number, a date/time picker, a checkbox, select, radio, or a password, and give it a label or some text explaining what you want your customers to do.
Email Options
This section allows you to set if you want custom fields to be displayed in emails. Also here you can define how fields should be outputted.
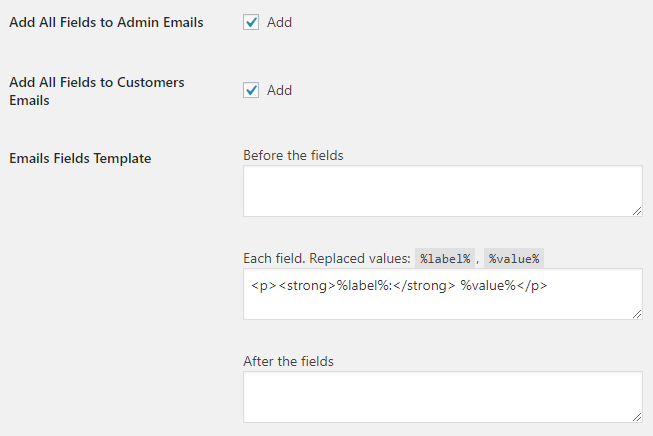
- Add All Fields to Admin Emails
- Enable this if you want all fields to be added to all emails to administrators.
- Default:
yes
- Default:
- Add All Fields to Customers Emails
- Enable this if you want all fields to be added to all emails to customers.
- Default:
yes
- Default:
- Emails Fields Template: Before the fields
- This option sets what should be outputted before the custom fields. For example try:
<table>.- Default: None
- Emails Fields Template: Each field
- This option sets how each field should be outputted. Replaced values:
%label%,%value%. For example try:<tr><th>%label%</th><td>%value%</td></tr>- Default:
<p><strong>%label%:</strong> %value%</p>
- Default:
- Emails Fields Template: After the fields
- This option sets what should be outputted after the custom fields. For example try:
</table>.- Default: None
Order Received Options
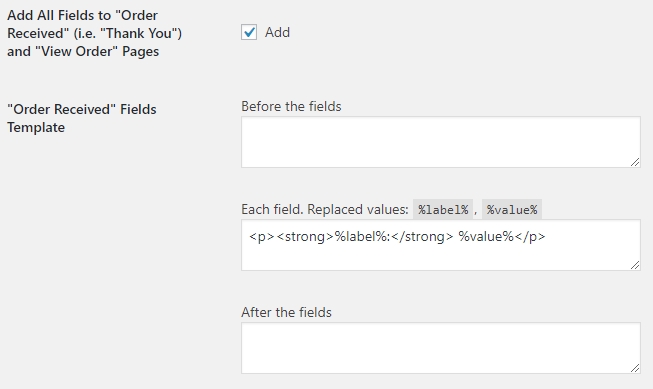
- Add All Fields to “Order Received” (i.e. “Thank You”) and “View Order” Pages
-
- Default:
yes
- Default:
- “Order Received” Fields Template: Before the fields
-
- Default: None
- “Order Received” Fields Template: Each field
- Replaced values:
%label%,%value%.- Default:
<p><strong>%label%:</strong> %value%</p>
- Default:
- “Order Received” Fields Template: After the fields
-
- Default: None
Custom Fields Number Option
- Custom Fields Number
- Sets the number of custom fields you want to add. Click “Save changes” after you change this number – new settings fields will appear.
- Default:
- Default:
Field’s Options
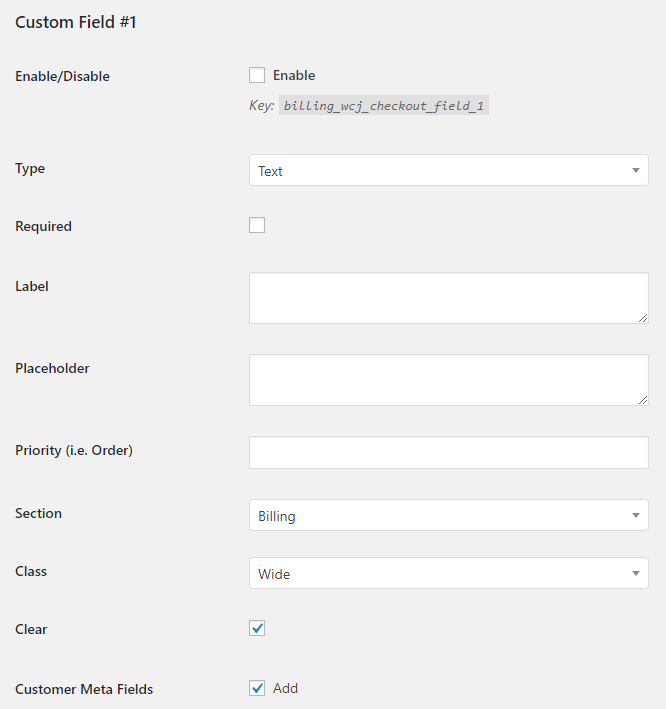
- Enable/Disable
- Enables the custom field.
- Default:
no
- Default:
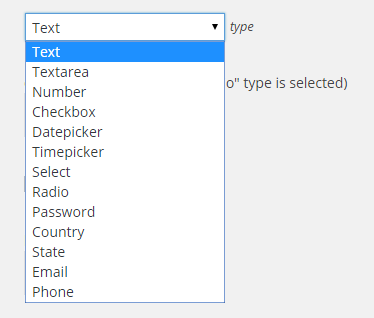
- Type
- Possible values: Text; Textarea; Number; Checkbox; Datepicker; Weekpicker; Timepicker; Select; Radio; Password; Country; State; Email; Phone.
- Default:
Text
- Default:
- Required
- Sets if the field is required to fill on checkout on not.
- Default:
no
- Default:
- Label
- Sets label for the field.
- Default: None
- Placeholder
- Sets placeholder for the field.
- Default: None
- Priority (i.e. Order)
- Here you can set the field’s position inside the section. Lower number will move the field higher in the section.
- Default: None
- Section
- Possible values: Billing; Shipping; Order Notes; Account.
- Default:
Billing
- Default:
- Class
- HTML class. Possible values: Wide; First; Last.
- Default:
Wide
- Default:
- Clear
- CSS clear option.
- Default:
yes
- Default:
- Customer Meta Fields
- Check this if you want the field to be added to the customer meta fields.
- Default:
yes
- Default:
Select and Radio Field Type Options
This subsection allows you to set options for select and radio type fields.
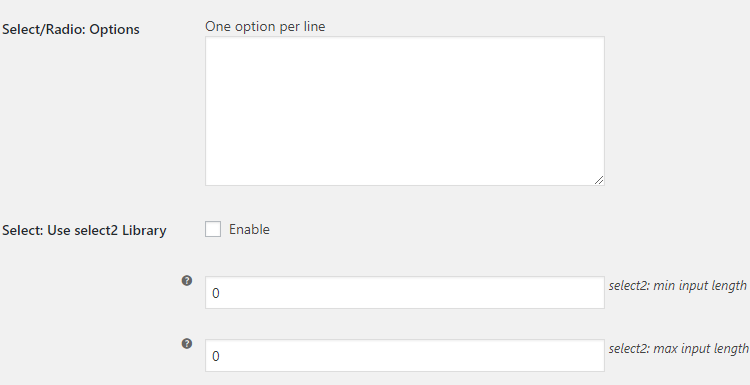
- Select/Radio: Options
- Set options for the field here. One option per line.
- Default: None
- Select: Use select2 Library
- Enable this if you want to use select2 library instead of standard HTML select input field.
- Default:
no
- Default:
- select2: min input length
- select2: Number of characters necessary to start a search. Ignored if set to zero.
- Default:
- Default:
- select2: max input length
- select2: Maximum number of characters that can be entered for an input. Ignored if set to zero.
- Default:
- Default:
Checkbox Field Type Options
This subsection allows you to set options for checkbox type fields.

- Checkbox: Value for ON
-
- Default:
Yes
- Default:
- Checkbox: Value for OFF
-
- Default:
No
- Default:
- Checkbox: Default Value
- Possible values: Not Checked; Checked.
- Default:
Not Checked
- Default:
Datepicker, Weekpicker and Timepicker Field Type Options
This subsection allows you to set options for datepicker, weekpicker and timepicker type fields.
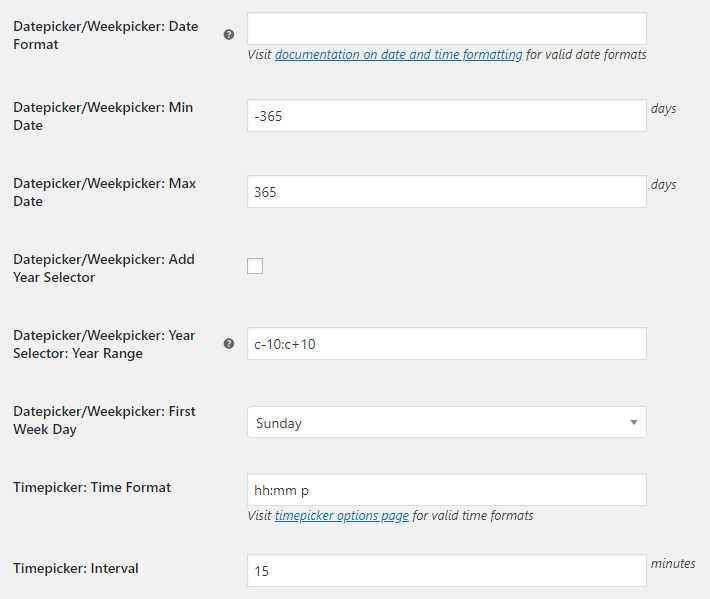
- Datepicker/Weekpicker: Date Format
- Leave blank to use your current WordPress format. Visit documentation on date and time formatting for valid date formats.
- Default: None
- Datepicker/Weekpicker: Min Date
- Min date in days.
- Default:
-365
- Default:
- Datepicker/Weekpicker: Max Date
- Max date in days.
- Default:
365
- Default:
- Datepicker/Weekpicker: Add Year Selector
-
- Default:
no
- Default:
- Datepicker/Weekpicker: Year Selector: Year Range
- The range of years displayed in the year drop-down.
- Default:
c-10:c+10
- Default:
- Datepicker/Weekpicker: First Week Day
- Possible values: Sunday; Monday; Tuesday; Wednesday; Thursday; Friday; Saturday.
- Default:
Sunday
- Default:
- Timepicker: Time Format
- Visit timepicker options page for valid time formats.
- Default:
hh:mm p
- Default:
- Timepicker: Interval
- Interval in minutes.
- Default:
15
- Default:
Field Visibility Options
This subsection allows you to show or hide custom checkout field, depending on what’s in cart.
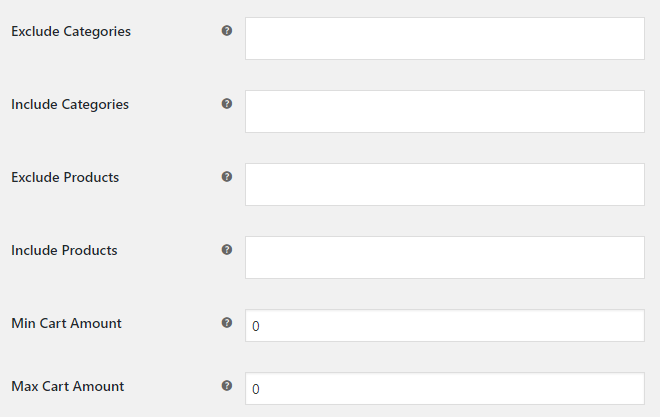
- Exclude Categories
- Hide this field if there is a product of selected category in cart.
- Default: None
- Include Categories
- Show this field only if there is a product of selected category in cart.
- Default: None
- Exclude Products
- Hide this field if there is a selected product in cart.
- Default: None
- Include Products
- Show this field only if there is a selected product in cart.
- Default: None
- Min Cart Amount
- Show this field only if cart total is at least this amount. Set zero to disable.
- Default:
- Default:
- Max Cart Amount
- Show this field only if cart total is not more than this amount. Set zero to disable.
- Default:
- Default:
Tips & Tricks
To add custom fields to Booster’s PDF invoices, you should use shortcode, e.g.:
You can use use Custom CSS Options (accessible through WooCommerce > Settings > Booster > EMAILS & MISC. > General). For example, to change default view of custom checkout radio buttons:
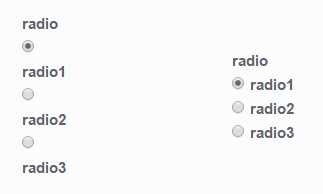
Custom CSS code for radio buttons restyling:
label.radio { display: inline !important; padding-left: 5px; }label.radio:after { content: 'A'; white-space: pre; }
Accessible through:
- WooCommerce > Settings > Booster > Cart & Checkout > Checkout Custom Fields
Tested on ![]() WooCommerce 4.0.0 and
WooCommerce 4.0.0 and ![]() WordPress 5.3.2Plugin can be downloaded here. If there are any locked fields in the module, you will need to get Booster Plus to unlock them.
WordPress 5.3.2Plugin can be downloaded here. If there are any locked fields in the module, you will need to get Booster Plus to unlock them.
WooCommerce Booster ModulesWooCommerce CheckoutWooCommerce Checkout Custom FieldsWooCommerce Checkout FieldsWooCommerce Custom Fields

 #comment>